Monday, December 18, 2006

word(s) of the day

aleatory and aleatoric - Composition depending upon chance, random accident, or highly improvisational execution, typically hoping to attain freedom from the past, from academic formulas, and the limitations placed on imagination by the conscious mind. There is a tradition of Japanese and Chinese artists employing aleatoric methods, many influenced by Taoism and Zen Buddhism. In the west, precedents can be found among artists of ancient Greece, and later among artists of the Italian Renaissance. Leonardo da Vinci (Italian, 1452-1519) recommended looking at blotches on walls as a means of initiating artistic ideas. Aleatory was also employed by numerous twentieth century avant-garde artists. Followers of the Dada and Surrealism produced numerous examples. Jean Arp (French, 1887-1966) made collages by dropping small pieces of paper onto a larger piece, then adhering them where they landed. AndrĂ© Masson (French, 1896-1987) and Joan MirĂ³ (Spanish, 1893-1983) allowed their pens to wander over sheets of paper in the belief that they would discover in those doodles the ghosts of their repressed imaginations. Similarly, Tristan Tzara (Rumanian, 1896-1963) created poetry by selecting sentences from newspapers entirely by chance.


bricolage - An improvised creation — or seemingly so — something made from whatever materials happen to be available. From the French bricole, meaning a trifle, and which the French used even earlier to mean catapault. Bricolage may be related to bric-a-brac.

Sunday, December 17, 2006

all sb assignments from mp2

Junior Portfolio
Sketchbook Assignments

Please put the week, the assignment, and the date in the lower right hand corner of each of your pages. It should look something like this Week 5 #1 12-18-06.

SB #1
Due: Nov. 20

A blind contour self portrait in a reflective surface (not a mirror). Super details! Take your time!
Draw 2 intersecting lines that divide your page into 4 different sections using light pencil lines. Over this, draw your unmade bed (wrinkled sheets and bunched up blankets and all). In one section use crosshatching (pencil or pen or marker) to add volume to the forms of the fabric, in the second section use just the pencil in a way that you get smooth transitions of value, the third use stippling (you may want to try a marker for this one), and in the fourth section experiment with expressive lines used in a way to suggest the forms.
Set up a small still life. Draw it without using lines. Use only shading and contrasting values to create the “outlines” of the objects and to suggest the volumes of the forms.
Set up a small still life (it can be the same one from #4, or you could try rearranging the objects or doing something completely different – and you will probably want to space the items out a bit for this one). Use markers, ink, or charcoal, (just because pencil will be a bit tedious, or you could give a whirl if you want) and draw only the negative space.
Look into a trash can (it will probably be a more interesting drawing if the trash can is full of stuff – freshly lysoled might be boring, but you make the call). Draw what you see, fill up your page.

SB #2
Due: Nov. 27

Draw the interior of something.
After you put on your pj's, draw the clothes you wore today wherever and however they happened to fall (on the floor, on a chair, in the hamper, etc.)
Something mechanical, use a specific color scheme (complementary, analogous, monochromatic, triadic, or split complements).
Find a quote about something that is going on in the world currently. Illustrate that quote however you see appropriate. Incorporate the quote into the final piece somehow.
Free – something that intrigues you

SB#3
Due: Dec. 4

Complete a blind contour drawing of an architectural element that fills up an entire page. Divide your page in half. On one half fill in the negative space with black (try marker, India ink, highly concentrated watercolor) and leave the positive space white. On the other half, do the inverse and fill in the positive space with black.
Draw a close view of a bike, tricycle, motorcycle, or an exercise bike with a close attention to detail. It should go off three sides of the page. Shade it with a full range of value. Try using a charcoal pencil for this one.
Draw an organic subject matter (person, animal, landscape, plant, something natural) by using only straight lines.
and 5. Choose two of the following subjects:
-Why are people afraid to visit cemeteries at night? Draw it.
-Draw a city on another planet.
-Draw a picture of yourself the way you will look 20 years from now.
-Draw a construction site.
-Free assignment – anything you would like!

SB #4
due: dec. 11
cut out a piece of newspaper the exact size of a page in your sketchbook. wrinkle it; fold it, if you wish. carefully paste it into your sketchbook. use charcoal, india ink, or black watercolor to create a drawing of something (hand, portrait, object, kitchen utensils, whatever) from direct observation.
use a soft drawing or charcoal pencil (2B, 4B or softer) to create a medium-light value on your entire piece of paper. use your finger or a soft tissue to help you blend your medium to create a soft, even value. choose something to draw, from direct observation. then use an eraser to begin to outline the highlighted areas. use your original medium to add darker values where needed.
set up a “landscape” using fabric (mountains, valleys, hills, rivers, etc) and small everyday objects (houses, cities, people, trees, etc). zoom in and draw the most interesting part of your landscape. try adding color.
draw a portrait of someone (you, family member, friend) with the light source being the sunlight coming in through mini-blinds or a lace curtain. pay attention to the subtleties in the light source as it changes and bends over the features of the face.
draw a sink full of dirty dishes. or the clean ones in the dishwasher or dish rack. this one might be interesting if done as a blind contour. try adding color.

SB #5
Due: Dec. 18
a crumpled paper bag
a figure
a still life
a plan for your next project (include notes about medium, technique, etc)
free

SB #6
Due: Jan. 2
a plan for a new project (include notes about medium, technique, etc)
a hand
a foot
free
free

SB #7
Due: Jan 8
1-5. a plan for a new project (include notes about medium, technique, etc)
begin a series of studies for your concentration

SB #8
Due: Jan 17
1-5. all sketches can be “free”, in a sense, but should be relevant studies for your concentration. plans/thumbnails/studies/etc. for your next projects.

~~~~~~~~~~~~~~~~~~~~~~~~~~~~~~~~~~~~~~

Painting
Sketchbook Assignments

Please put the week, the assignment, and the date in the lower right hand corner of each of your pages. It should look something like this Week 5 #1 12-18-06.

SB #1
Due: Nov. 20
1. Find a can or bucket of recyclables, look into it from above. Draw what you see, use a range of values from 1-10, fill up your entire page.
2. Set up a small still life. Use a desk lamp or other light source to light it from behind. Draw it; use values to accurately portray the direction of the light source.
3. Use the same set up as in #2, but this time move the light source to the side so that it is being lit dramatically from one side. Draw it; use values to accurately portray the direction of the light source.
4. Set up another still life of 3 different objects with 3 very different textures. Use value to imply the form of the objects, as well as the textures.
5. Find a quote about art, painting, or color. Illustrate that quote any way you feel appropriate. Find a way to incorporate the quote into the final composition. And please include the author.

SB #2
Due: Nov. 27
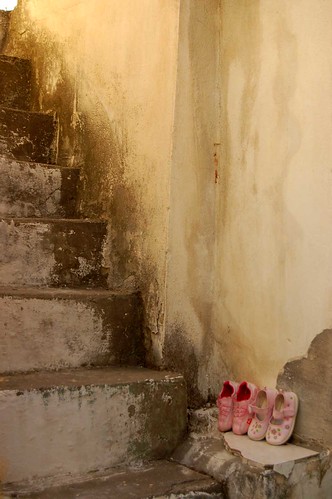
1. Pile up all your favorite shoes in the corner of your room (at least 3 pairs). Zoom in on the most interesting section (crop your composition). Fill up your entire page with a blind contour drawing. Add color where appropriate.
2. Draw an unsuspecting life model in a study hall, library, in class after you finish a test, in the cafeteria, etc. Draw large, try using expressive lines (quick, sketchy, gestural lines).
3. Listen to your favorite song. Draw what you hear. Do not use recognizable words, images, or symbols. Only use line and color.
4. Draw the inside of your closet. Use a 1-10 value scale.
5. Ask a family member to pose for you. Draw them reading a book, watching tv, napping, knitting, etc. on a couch or chair. Use a 1-10 value scale.

SB #3
Due: Dec. 4
1. "Full of Contours Page"
Do a page full (20 to 25) of "mini" blind and modified blind contour drawings. (May take 2 facing pages.)
These are quick studies of people/children in different positions doing things.
Perhaps go to a park or a sporting event of some kind. Observe and quickly draw people being active
Do this in pen/marker please!! Add some color to complete the composition
2. "Fallen Leaves"
Find several different types (shapes) of leaves and trace them into your sketchbook. These may have to be repeated several times to make a good composition.
Now divide the page into four separate areas. Please do this creatively also! Then using colored pencils, color each area in one of these four color schemes:
1. Complimentary colors: colors opposite each other on the color wheel
2. Analogous colors: three or more colors touching each other on the color wheel
3. Monochromatic - Tints and shades: one of the above two color schemes with white and black added to lighten or darken.
4. Neutrals – Color with its complement added to create a “duller” version of the original color.

3. "Size Distortions"
Choose two ordinary objects at home which have a relationship to one another but are not the same size at all. (Like: the front door and a key -- or -- the refrigerator and an apple.
Draw the two different sized objects as if they are the same size, and draw them so they have a new relationship at the new size.(So: the key is as big as the door in the new relationship, and can only lean upon it!)(So: the apple could be so big that it occupied the entire inside of the refrigerator!)
Be inventive! Think up your own two related objects, and observe and draw their details carefully. Plan an interesting composition on the page.
4. "Magazine Reflection"
Step 1. Use facing pages in your sketchbook.Side by side if your book opens that way, or up-down if your book opens that way.Step 2. Find a full page magazine photo (not a magazine illustration) that you like. B/W or color, but B/W is easier on this.Step 3. Cut the photo into 10 pieces that are about the same area. They don't have to be the same shape. Shapes can be regular or not. Try to cut through interesting areas of the photo (like the face!)
Step 4 Select alternating pieces, and paste them in their correct positions on the right side of the paper. Paste the remainders on the left, also in their correct positions.
Step 5: Choose one side and shade in the missing areas in pencil, using the opposite page of pieces as reference for what to draw. Try to recreate the values (lights and darks) of the original photo.
5. Free – something that inspires you.

SB #4
due: dec. 11
1. draw a sink full of dirty dishes. or the clean ones in the dishwasher or dish rack. this one might be interesting if done as a blind contour. try adding color.
2. set up a still life of things you find in the kitchen (spoons, spatulas, whisks, shiny pots and pans, etc). draw it using pencil, a value scale of 1-10. pay attention to details, reflections, etc.
3. the view from your window. draw it using pencil, a value scale of 1-10, and pay attention to details.
4. sit in front of a mirror. draw a blind contour self portrait. do not lift up the pencil; do not look at your paper. stare at every detail of every feature of your face. do not move your pencil until you are absolutely positive of where the line is going.
5. stay in front of the mirror. now draw a self portrait using pencil and a value scale of 1-10, but this time you can look at the paper.

SB #5
Due Dec. 18
1. A blind contour drawing of an architectural element, fill your entire page.
2. 2 hands, in 2 different positions, on the same page. Super detailed rendering, add value and texture.
3. Look into a mirror and make an exaggerated facial expression. Draw it, fill up your entire page, and pay attention to all the details/volumes of your face.
4. free – must be from direct observation
5. free – can be from your imagination

SB #6
Due: Jan. 2
1. Illustrate your favorite quote, lyrics, or poem.
2. Use light pencil lines to divide your page into at least 6 different sections (any size or shape). Set up a still life, and use light pencil lines to block it in. In some of the sections, use color to complete your still life, and in the alternating sections, use only pencil to add value to your drawing.
3. A plant or foliage. Zoom in so that the plant fills up the entire page, don’t leave any negative space around your plant. Pay attention to all of the directions that the leaves and stems go, render it as accurately as possible. Use your pencil to portray accurate volumes and values.
4. A crumpled paper bad/wrapping paper/etc. Pay attention to volumes. Use accurate rendering of value to create the shapes of the wrinkled paper.
5. A family member

SB #7
Due: Jan 8
1. A shoe. Must be super detailed, add value and texture.
2. Assemble an assortment of bottles. Take one bottle at a time to your table/desk, and do a blind contour line drawing of it, starting anywhere on your page. Then do the same thing with another bottle. Fill your page with overlapping bottle shapes. Bottles that are meant to be in front must have a base that is lower on the page than the object that is behind it. You are creating a “landscape” of bottles.
3. A page full of several different blind contour drawings of hands. They should all be in different poses, can overlap, and should add color where appropriate.
4. free – must be from direct observations
5. free – can be from your imagination

SB #8
Due: Jan 17
1. Add value and color to the bottle landscape you drew last week. Think about “atmospheric perspective” – things that are farther away have bluer, lighter, and duller hues. (try adding the complement to create a duller color for the background objects) Also, warm colors tend to come forward in a composition, while cool colors appear to recede.
2. A blind contour of a junk drawer, closet or other sort of cluttered storage space.
3. Free – must be from direct observation
4. Free – must be from direct observation
5. Free – can be from your imagination

~~~~~~~~~~~~~~~~~~~~~~~~~~~~~~~~~~~

Design Fundamentals
Sketchbook Assignments

Please put the week, the assignment, and the date in the lower right hand corner of each of your pages. It should look something like this Week 5 #1 12-20-06.

*all drawings should be large and fill up your entire page.

SB #1
Due: Nov. 22

1. Create a page of different value scales. Divide your page using a ruler into 5-1x10” rectangles. Each 1x10” rectangle should be divided into 10 1” squares. Go from darkest to lightest using the following techniques:
Lines (pencil - one direction only), stippling (fine point black marker - tiny dots), crosshatching (pencil - criss crossed lines), “squiggles” (pencil), and smooth shading (pencil – pencil strokes should not be visible)
2. Draw an object in your room. Your drawing should touch at least 3 edges of the paper. Use pencil in a way similar to the way we used the charcoal pencil in the still life drawings to add value to imply the volume of the form. Do not use your finger to blend!
3. A blind contour portrait of a family member. This should take at least 20 minutes, so take your time, do not look at the paper, and fill up the entire page.
4. Find a crumpled paper or plastic shopping bag. Use a regular pencil to draw it, use a range of values from 1-10. Show every wrinkle, shape, edge, etc.
5. Make a really funny, goofy, angry or otherwise exaggerated facial expression. Use a mirror to draw yourself. Remember to use a value scale 1-10.

SB #2
Due: Nov. 29

1. Where are the cleaning supplies kept in your house? (The windex, lysol, sponges, mops, etc.) Open the draw, cabinet, or closet, and draw a blind contour of exactly how you see what you see. Your drawing should fill up the entire page, don't lift up your pencil or look at the paper!
2. A bowl or plate of food. Recreate all the textures, make it look delicious!
3. A tiny, sentimental object. Enlarge it to heroic scale and let if fill up your entire page (touch 3 edges of your paper), use values 1-10.
4. Find an interesting color photo/ad in a magazine. Carefully remove the page, and then tear it in half. Carefully paste one half of the page into your sketchbook. Then, using just pencil, recreate the missing half of the image. Remember values 1-10, recreation of shapes, lines, textures.
5. Illustrate this quote by Joan Miro (and you may want to research the artist a bit...) “I try to apply colors like words that shape poems, like notes that shape music.”

SB #3
Due: Dec. 6
1. A still life set up of at least 3 objects. Use a pen or ultra fine point sharpie, use cross hatching OR stippling to create a value scale of 1-10 in shading the forms.
2. Begin by drawing an abstract, free-form line on the page. Then use other lines to echo the original line, flowing with it, into it, and away from it. Add color on or between the lines. You must create new variations away from your first lines to make it look different!
3. Try to make as many types of expressive lines as you can. Repeat each type of line several times. Try all types of lines: wavy, curly, jagged, dashes, fat, thin, etc. Fill your page with as many lines as you can. Use color to complete your composition.
4. Fill the page with overlapping shapes that run off the page on all sides. No negative spaces larger than a quarter. Fill each pos/neg space with smooth pencil gradations (from light to dark).
5. An observational drawing, any subject matter. Must be drawn from direct observation.

SB #4
due: Dec. 13
1. set up a small still life. use a desk lamp or other light source to light it from behind. draw it; use values to accurately portray the direction of the light source.
2. use the same set up as in #1, but this time move the light source to the side so that it is being lit dramatically from one side. draw it; use values to accurately portray the direction of the light source.
3. set up another still life of 3 different objects with 3 very different textures. use value to imply the form of the objects, as well as the textures.
4 & 5. collect a bunch of items with very different textures. scraps of fabric, lace, burlap, etc, different types of paper or cardboard, wood, sea shells, sand paper, sand, dried beans or grains, different kinds of plastic, packages, etc. don’t bring in anything valuable! Most of the items you bring in should be scavenged from the trash or recycling. put it all in a bag or box with your name on it.
(this part counts as 2 sketches, so 20 points)

SB#5
Due: Dec. 20
1. Draw 9 2”x2” squares on your page. Find three different objects with the different real textures. In the 1st row of squares, use line and value to create a very accurate rendering of each texture, label each square as to what it represents. In the 2nd row, simplify the texture into a pattern, using line and value. In the 3rd row, abstract the texture into pure geometric forms and lines.
2. Take home 8 sheets of 9x12 newsprint. Use a peeled crayon on its side to complete a series of rubbings of different textures (the technical term is “frottage” - The technique of rubbing with crayon or graphite on a piece of paper which has been placed over an object. Such impressions are usually made from such highly textured subjects as leaves, wood, wire screen, gravestones, and manhole covers). Now, in your sketchbook, divide a page into at least 8 sections, can be any size or shape (i.e., they do not have to be rectangles. If you use more than 8 sections, repeat the textures – this could add more unity to your composition...) and fill up each section with a drawn representation of the frottages. You are reducing the texture rubbings into patterns. Use color to make a successful composition.
3. Color Wheel – use color!
Create an interesting shape to repeat and fill with primary colors (R, Y, B)
Create another shape to repeat and fill with secondary colors (O, G, V)
Create a third shape to use for tertiary colors (RO, YO, YG, BG, BV, RV)
Label the color names (Notice that primaries and secondaries have their own names, but tertiary color names are a double-name)
Plan your drawing in pencil so that it will be big on the page. OK to use object shapes - Shapes with a related theme work best! Make it decorative! Embellish the page! OK to make the lettering part of the design! Finish with an ink outline.


SB#6
Due: Jan. 3
1. 2 hands, in 2 different positions, on the same page. Super detailed rendering, add value and texture.
2. Use light pencil lines to divide your page into at least 6 different sections (any size or shape). Set up a still life, and use light pencil lines to block it in. In some of the sections, use color to complete your still life, and in the alternating sections, use only pencil to add value to your drawing.
3. A plant or foliage. Zoom in so that the plant fills up the entire page, don’t leave any negative space around your plant. Pay attention to all of the directions that the leaves and stems go, render it as accurately as possible. Use your pencil to portray accurate volumes and values.
4. A crumpled paper bad/wrapping paper/etc. Pay attention to volumes. Use accurate rendering of value to create the shapes of the wrinkled paper.
5. Free – must be from direct observation.

SB#7
Due: Jan. 10
1. Find an asymmetrical 3-D object (NOT a rubix cube). Draw it from the front. Rotate it 90° clockwise, draw it. Rotate it another 90° and draw it from the back. Rotate it another 90° and draw it. Now look at from above and draw it. So, you should have 5 completely different views of the same subject on the same page. A line drawing is sufficient for this exercise, shading is not necessary.
2. Use value (lights and darks) to create the illusion of form (meaning 3-D shapes). Draw your unmade bed and pay attention to all the wrinkles, folds, and volumes of the fabric.
3. Find two objects, one that is a “cube” and one that is a sphere. Do not use outlines to draw them, only value. Show the volumes of the form without using hard outlines. Use pencil.
4. Find two objects, one that is a “cone” or “pyramid” and another that is a “cylinder”. Use the same technique in #3 to draw them.
5. Free – must be from direct observation.

Saturday, December 16, 2006

written critique

Painting Critique
Answer the following questions about your painting. Use a seperate sheet of lined paper, write neatly, use a pen (or type), and use complete sentences. Ellaborate, tell me WHY! you have the opinions that you do.
Due: Monday

1. Describe:
Elements of Art
the building blocks or ingredients of art
a. Line -
b. Color -
c. Value -
d. Texture -
e. Shape/Form -

2. Analyze:
Principles of Design
a. Focal point/emphasis -
b. Variety/Repetition
variety -
repetition -
c. Space -
positive -
negative -
d. Balance -
e. Movement -
f. Harmony/Unity
harmony -
unity -
g. Overall, how do the elements work together to form a successful (or unsuccessful)
design? Why?

3. Interpret:
a. What does this painting mean? What is it about? Why?

4. Evaluate:
a. What techniques worked well and what did not? Why do you feel that way?
b. What is the quality of the craftsmanship? Do you see a lot of effort put into this piece?
c. Overall, is it successful? Why or why not?

~~~~~~~~~~~~~~~~~~~~~~~~~~~~~~~~~~~~~~~~~~~~~~~~~~

There are 4 major categories of art criticism; description, analysis, interpretation, and evaluation. If you discuss a piece of work adressing these four categories and in the general order in which they are presented, you will soon become a professional and eloquent art critic!

Listed below are the questions you should be answering in each category. Keep this page in your sketchbook so that you have this reference to help guide you during all critiques.

Description
Describe exactly what you see:
· I (enjoy, dislike, appreciate, etc.) this work because...
· Do not use “four letter words” (i.e. like, hate, nice, ugly, etc.)
· Describe (what and where) the “elements” (line, shape, color, form, value, space) and subject matter.
Analysis
Describe how the work is organized as a complete composition:
· Where/what is the focal point/point of emphasis, why?
· How is the work constructed or planned (i.e., movements, balance, contrast, rhythm, unity, and variety)?
· Identify some of the similarities throughout the work (i.e., repetition of lines, colors, or shapes, and/or how they are varied)
Interpretation
Describe how the work makes you think or feel:
· Describe the expressive qualities you find in the work. What expressive language would you use to describe the qualities (i.e., tragic, angry, funny)?
· Does the work remind you of other things you have experienced (i.e., analogy or metaphor)?
· How does the work relate to other ideas or events in the world and/or in your other studies?
Evaluation
Present your opinion of the work's success or failure:
· What qualities of the work make you feel it is a success or failure?
· What criteria can you list to help others judge this work?
· How original is the work? Why do you feel this work is original or not original?


Elements of Art
and
Principles of Design

Elements of Art
the building blocks or ingredients of art
Line - a mark made with a pen, pencil, or other tool, that could be straight, curved, squiggly, jagged, thin, thick, real or implied.
Color - the quality of an object or substance with respect to light reflected by the object, usually determined visually by measurement of hue, saturation, and brightness of the reflected light; saturation or chroma; hue.
Value - degree of lightness or darkness in a color, the relation of light and shade in a painting, drawing, or the like.
Texture - the visual and/or tactile quality of a surface, the characteristic visual and tactile quality of the surface of a work of art resulting from the way in which the materials are used, the imitation of the tactile quality of represented objects.
Shape/Form - the quality of a distinct object in having an external surface or outline of specific form or figure. three-dimensional quality or volume, as of a represented object or anatomical part.

Principles of Design
the rules or recipe for a way the elements are put together to create a successful composition
“the organization, placement, or relationship of basic elements, as lines and colors in a painting or volumes and voids in a sculpture, so as to produce a coherent image; the formal structure of a work of art.”
Balance - A principle of design, it refers to the way the elements of art are arranged to create a feeling of stability in a work; a pleasing or harmonious arrangement or proportion of parts or areas in a design or composition. Portions of a composition can be described as taking on a measurable weight or dominance, and can then be arranged in such a way that they appear to be either in or out of balance, or to have one kind of balance or another. Balance can be symmetrical, or formal; or it can be asymmetrical, or informal. It can also be radial.

Movement - The act or process of moving, especially change of place or position, an effort. This can either be actual motion or it can be implied — the arrangement of the parts of an image to create a sense of motion by using lines, shapes, forms, and textures that cause the eye to move over the work. A principle of design, it can be a way of combining elements of art to produce the look of action. In a painting or photograph, for instance, movement refers to a representation or suggestion of motion. In sculpture too, movement can refer to implied motion. On the other hand, mobiles and kinetic sculptures are capable of actual motion as well.

Focal point/emphasis - Any forcefulness that gives importance or dominance (weight) to some feature or features of an artwork; something singled out, stressed, or drawn attention to by means of contrast, anomaly, or counterpoint for aesthetic impact. A way of combining elements to stress the differences between those elements and to create one or more centers of interest in a work. Often, emphasized elements are used to direct and focus attention on the most important parts of a composition — its focal point. Emphasis is one of the principles of design. A design lacking emphasis may result in monotony. The portion of an artwork's composition on which interest or attention centers. The focal point may be most interesting for any of several reasons: it may be given formal emphasis; its meaning may be controversial, incongruous, or otherwise compelling.

Harmony/Unity
harmony - Agreement; accord. A union or blend of aesthetically compatible components. A composition is harmonious when the interrelationships between its parts fulfill aesthetic requisites or are mutually beneficial. As a principle of design, harmony refers to a way of combining elements of art to accent their similarities and bind the picture parts into a whole. It is often achieved through the use of repetition and simplicity.
unity - The quality of wholeness or oneness that is achieved through the effective use of the elements and principles of design. A totality that combines all of its parts into one complete, cohesive whole. Often it is realized through a deliberate or intuitive balancing of harmony and variety. However, this balance does not have to be of equal proportions. Harmony might outweigh variety, or variety might outweigh harmony. Harmony aids efforts to blend picture parts together to form a whole. Variety adds visual interest to this unified whole. A composition is unified when the relationships between its parts interact to create a sense that no portion of the composition may be changed without altering the aesthetic integrity and meaning of the artwork. When unity is achieved with insufficient harmony and variety, the result is monotony. Unity is largely synonymous with coherence.

Variety/Repetition
variety - A principle of design that refers to a way of combining elements of art in involved ways to achieve intricate and complex relationships. Variety is often obtained through the use of diversity and change by artists who wish to increase the visual interest of their work. An artwork which makes use of many different hues, values, lines, textures, and shapes would reflect the artist's desire for variety. Unity is the principle which is its variety's opposite; but when there is too little variety, the result is monotony.
repetition - Closely related to harmony, a principle of design, this term refers to a way of combining elements of art so that the same elements are used over and over again. Thus, a certain color or shape might be used several times in the same picture. Repetition also can contribute to movement and rhythm in a work of art.

Space - refers to the distance or area between, around, above, below, or within things. It can be described as two-dimensional or three-dimensional; as flat, shallow, or deep; as open or closed; as positive or negative; and as actual, ambiguous, or illusory.
positive - filled with something, such as lines, designs, color, or shapes
negative – the empty space (perhaps the background)

Thursday, December 14, 2006

Wednesday, December 13, 2006

design fundamentals!

obviously we are doing a project involving texture. so, i found this website, it has every texture ever, take a look.... and this one also....

and here are your future sb assignments...

Design Fundamentals

Sketchbook Assignments


Please put the week, the assignment, and the date in the lower right hand corner of each of your pages. It should look something like this: Week 5 #1 12-20-06

*all drawings should be large and fill up your entire page.


SB#5

Due: 12.20.06

  1. Draw 9 2”x2” squares on your page. It should look like this:

    Find three different objects with the different real textures. In the 1st row of squares, use line and value to create a very accurate rendering of each texture, label each square as to what it represents. In the 2nd row, simplify the texture into a pattern, using line and value. In the 3rd row, abstract the texture into pure geometric forms and lines.

  2. Take home 8 sheets of 9x12 newsprint. Use a peeled crayon on its side to complete a series of rubbings of different textures (the technical term is “frottage” - The technique of rubbing with crayon or graphite on a piece of paper which has been placed over an object. Such impressions are usually made from such highly textured subjects as leaves, wood, wire screen, gravestones, and manhole covers). Now, in your sketchbook, divide a page into at least 8 sections, can be any size or shape (ie, they do not have to be rectangles. If you use more than 8 sections, repeat the textures – this could add more unity to your composition...) and fill up each section with a drawn representation of the frottages. You are reducing the texture rubbings into patterns. Use color to make a successful composition.

  3. Color Wheel – use color!

    Create an interesting shape to repeat and fill with primary colors (R, Y, B)

    Create another shape to repeat and fill with secondary colors (O, G, V)

    Create a third shape to use for tertiary colors (RO, YO, YG, BG, BV, RV)

    Label the color names (Notice that primaries and secondaries have their own names, but tertiary color names are a double-name)

Plan your drawing in pencil so that it will be big on the page. OK to use object shapes -
Shapes with a related theme work best! Make it decorative! Embellish the page! OK to make the lettering part of the design! Finish with an ink outline.


SB#6

Due: 1.3.07

  1. 2 hands, in 2 different positions, on the same page. Super detailed rendering, add value and texture.

  2. Use light pencil lines to divide your page into at least 6 different sections (any size or shape). Set up a still life, and use light pencil lines to block it in. In some of the sections, use color to complete your still life, and in the alternating sections, use only pencil to add value to your drawing.

  3. A plant or foliage. Zoom in so that the plant fills up the entire page, don’t leave any negative space around your plant. Pay attention to all of the directions that the leaves and stems go, render it as accurately as possible. Use your pencil to portray accurate volumes and values.

  4. A crumpled paper bad/wrapping paper/etc. Pay attention to volumes. Use accurate rendering of value to create the shapes of the wrinkled paper.

  5. Free – must be from direct observation.


SB#7

Due: 1.10.07

  1. Find an asymmetrical 3-D object (NOT a rubix cube). Draw it from the front. Rotate it 90° clockwise, draw it. Rotate it another 90° and draw it from the back. Rotate it another 90° and draw it. Now look at from above and draw it. So, you should have 5 completely different views of the same subject on the same page. A line drawing is sufficient for this exercise, shading is not necessary.

  2. Use value (lights and darks) to create the illusion of form (meaning 3-D shapes). Draw your unmade bed and pay attention to all the wrinkles, folds, and volumes of the fabric.

  3. Find two objects, one that is a “cube” and one that is a sphere. Do not use outlines to draw them, only value. Show the volumes of the form without using hard outlines. Use pencil.

  4. Find two objects, one that is a “cone” or “pyramid” and another that is a “cylinder”. Use the same technique in #3 to draw them.

  5. Free – must be from direct observation.

Tuesday, December 12, 2006


opa! we love smashing plates. and dirty sinks!
How to cut a mat

1. Select the artwork to be matted.
2. You will be using a 3” mat, meaning a 3” border around your artwork.
3. Use cropping angles (hanging on the phone near the paper cutter) to crop your art work to establish the best composition. Also, use the angles to figure what color mat will look BEST with your artwork, BLACK, WHITE or CREAM.
4. Get a ruler and a sharp pencil.
5. Measure the inside measurements for your mat, meaning the width and hieght of the window you will be cutting. Write these measurements on a scrap of paper or in the border of your artwork.
6. Now, here comes the MATH Add 6 to both measurements. The answer to this are the dimensions for the OUTSIDE edge of your mat. Ah, simple math.
Example: I want 14”x 18¾” of my artwork to show. So I will add 6 to both measurements, it should look like this (write it out just like this, it makes it easier to check your measuring and your math):
14” x 18¾” -------> inside measurements
+6 +6
20” x 24¾” -------> outside measurements
7. If your measurements are less than 20”x30” use the half sheet of mat board. If your measurements are more than 20”x30” but less than 30”x40” use the full sheet of mat board.
8. Before you get mat board, make sure the area you are working in is clean You do not want paint or charcoal on the front of your mat. Put your artwork in a safe place. It is never fun when it accidently ends up in the path of an angry mat knife.
9. Now, get a T-Square and a cutting mat (to protect your blade, as well as the table)
10. Now you can get a sheet of mat board. Draw all of your measurements on THE BACK of your mat board. Pencil lines just arent attractive.
11. Use a T-Square to measure the OUTSIDE dimensions of your mat. Measure in a way to create the least amount of waste, meaning the excess is one larger piece of mat board, rather than 2 skinny pieces. That way someone can use your scraps to mat a smaller piece of work. And the trees wont be sad.
12. Get a mat cutter (aka box cutter, mat knife, etc). Make sure the blade is sharp If it appears old or dull, I can snap it off for you or replace the blade all together. Whatever you do, DO NOT use a frumpy knife, you will get a frumpy mat
13. Now, cut the outside of your mat.
14. NO WAIT Measure twice, cut once Double check all your measurements
15. Now, you can really go ahead and cut your mat. Line everything up to the edge of the table and use a T-square to guarantee a square(90°) mat.
16. If you are right handed, hold the blade in your right hand, the ruler in your left. Line the ruler up on the LEFT side of the line you are cutting. The ruler should be on the GOOD side of your mat board, while the blade should be on the RIGHT side of the line, meaning the side you do not need. If you are a lefty, hold the blade in the left hand, ruler in the right. The ruler should be on the right side of the line, on the good side of the mat board. The blade should be to the left of the line, on the side you do not need.
17. Now, the edge of the blade should be flush against the edge of the T-square. Push down and towards the ruler, carefully cutting the mat board. By pushing against the ruler with the blade you will ensure a perfect cut. Make sure you counterbalance the pressure of your cutting hand with equal and opposite pressure from your ruler-holding hand. Hm, simple physics.
18. You made need to run the blade two or three times to cut through the mat, make sure it goes in the same exact line as the first (dont move the ruler and dont take your hand of the ruler until it is completely cut).
19. Now that the mat is cut PERFECTLY, it is time to measure the INSIDE measurements. Measure in 3” from EACH edge of your mat. Make two little marks, and connect them to make a straight line. The line should be parallel to the edge from which you measured in 3” and perfectly perpendicular to the other edge.
20. Now that your inside window is measured and drawn, CHECK IT. Make sure the inside measurements are IDENTICAL to your original measurements. If they are correct, then you may proceed. If not, FIX it MEASURE TWICE, CUT ONCE
21. Cut the inside of your mat out very carefully, making sure you stop where identified by all your previously drawn lines.
22. If the inside does not easily pop out, do not force it. Carefully recut your edges to help avoid tearing your edge.
23. You have a fabulous little frame, dont you? Ah, yes, because you followed all my directions Good show
24. Now, carefully place your artwork under the mat, line it up perfectly. Place a small piece of masking tape to secure it temporarily.
25. Flip it over, and tape all of your edges completely, using the 3” masking tape.
26. Flip it over again, and check to make sure the work is in the correct spot.
27. Flip it to the back again and carefully center the inside cut out (the equivilent of a munchkin) on the back to make your work a bit studier. Completely tape all edges with the 3” masking tape.
28. Now, flip it to the front and carefully admire your handiwork Sign the bottom right corner of your work (NOT the mat) in the same medium you used for your piece.
29. Congratulations, you are a pro
30. Now, CLEAN UP Scrap mat goes in the scrap mat bin, the rulers go in the drawer, the cutting mats go in the cabinet under the light box near the sink, the knives and tape go back in or on my desk, and tiny scraps or tape balls go in the garbage. Now, a real congratualtions are in order

Sunday, December 10, 2006

painting sketchbooks #5-8

Painting

Sketchbook Assignments

Please put the week, the assignment, and the date in the lower right hand corner of each of your pages. It should look something like this Week 5 #1 12-18-06.


SB #5

Due Dec. 18

  1. A blind contour drawing of an architectural element, fill your entire page.

  2. 2 hands, in 2 different positions, on the same page. Super detailed rendering, add value and texture.

  3. Look into a mirror and make an exaggerated facial expression. Draw it, fill up your entire page, and pay attention to all the details/volumes of your face.

  4. free – must be from direct observation

  5. free – can be from your imagination


SB #6

Due: Jan. 2

  1. Illustrate your favorite quote, lyrics, or poem.

  2. Use light pencil lines to divide your page into at least 6 different sections (any size or shape). Set up a still life, and use light pencil lines to block it in. In some of the sections, use color to complete your still life, and in the alternating sections, use only pencil to add value to your drawing.

  3. A plant or foliage. Zoom in so that the plant fills up the entire page, don’t leave any negative space around your plant. Pay attention to all of the directions that the leaves and stems go, render it as accurately as possible. Use your pencil to portray accurate volumes and values.

  4. A crumpled paper bad/wrapping paper/etc. Pay attention to volumes. Use accurate rendering of value to create the shapes of the wrinkled paper.

  5. A family member


SB #7

Due: Jan 8

  1. A shoe. Must be super detailed, add value and texture.

  2. Assemble an assortment of bottles. Take one bottle at a time to your table/desk, and do a blind contour line drawing of it, starting anywhere on your page. Then do the same thing with another bottle. Fill your page with overlapping bottle shapes. Bottles that are meant to be in front must have a base that is lower on the page than the object that is behind it. You are creating a “landscape” of bottles.

  3. A page full of several different blind contour drawings of hands. They should all be in different poses, can overlap, and should add color where appropriate.

  4. free – must be from direct observations

  5. free – can be from your imagination


SB #8

Due: Jan 17

  1. Add value and color to the bottle landscape you drew last week. Think about “atmospheric perspective” – things that are farther away have bluer, lighter, and duller hues. (try adding the complement to create a duller color for the background objects) Also, warm colors tend to come forward in a composition, while cool colors appear to recede.

  2. A blind contour of a junk drawer, closet or other sort of cluttered storage space.

  3. Free – must be from direct observation

  4. Free – must be from direct observation

  5. Free – can be from your imagination

jp sketchbooks #5-8

Junior Portfolio

Sketchbook Assignments

Please put the week, the assignment, and the date in the lower right hand corner of each of your pages. It should look something like this Week 5 #1 12-18-06.


SB #5

Due Dec. 18

  1. a crumpled paper bag

  2. a figure

  3. a still life

  4. a plan for your next project (include notes about medium, technique, etc)

  5. free


SB #6

Due: Jan. 2

  1. a plan for a new project (include notes about medium, technique, etc)

  2. a hand

  3. a foot

  4. free

  5. free


SB #7

Due: Jan 8

  1. a plan for a new project (include notes about medium, technique, etc)

    1. begin a series of studies for your concentration


SB #8

Due: Jan 17

1-5. all sketches can be “free”, in a sense, but should be relevant studies for your concentration. plans/thumbnails/studies/etc. for your next projects.

Friday, December 8, 2006

jp!

you can turn in your sketchbooks on tuesday, if you like, cailey said so.

Tuesday, December 5, 2006

yum, paint....


look, this guy gets his vitamins from paint, too!

Saturday, December 2, 2006

prints...

take a look...
im kind of in love with the colors...

relief prints - gallery


Friday, December 1, 2006

sketchbook assignments #4

junior portfolio

sketchbook #4

due: monday, december 11th

  1. cut out a piece of newspaper the exact size of a page in your sketchbook. wrinkle it, fold it, if you wish. carefully paste it into your sketchbook. use charcoal, india ink, or black watercolor to create a drawing of something (hand, portrait, object, kitchen utensils, whatever) from direct observation.

  2. use a soft drawing or charcoal pencil (2B, 4B or softer) to create a medium-light value on your entire piece of paper. use your finger or a soft tissue to help you blend your medium to create a soft, even value. choose something to draw, from direct observation. then use an eraser to begin to outline the highlighted areas. use your original medium to add darker values where needed.

  3. set up a “landscape” using fabric (mountains, valleys, hills, rivers, etc) and small everyday objects (houses, cities, people, trees, etc). zoom in and draw the most interesting part of your landscape. try adding color.

  4. draw a portrait of someone (you, family member, friend) with the light source being the sunlight coming in through mini-blinds or a lace curtain. pay attention to the subtleties in the light source as it changes and bends over the features of the face.

  5. draw a sink full of dirty dishes. or the clean ones in the dishwasher or dishrack. this one might be intersting if done as a blind contour. try adding color.

~~~~~~~~~~~~~~~~~~~~~~~~~~~~~~~~~~~~~~~~~~~~~~~~~~~~~~~~~~~~~~~~~~

painting

sketchbook #4

due: monday, december 11th

  1. draw a sink full of dirty dishes. or the clean ones in the dishwasher or dishrack. this one might be intersting if done as a blind contour. try adding color.

  2. set up a still life of things you find in the kitchen (spoons, spatulas, whisks, shiny pots and pans, etc). draw it using pencil, a value scale of 1-10. pay attention to details, reflections, etc.

  3. the view from your window. draw it using pencil, a value scale of 1-10, and pay attention to details.

  4. sit in front of a mirror. draw a blind contour self portrait. do not lift up the pencil, do not look at your paper. stare at every detail of every feature of your face. do not move your pencil until you are absolutely positive of where the line is going.

  5. stay in front of the mirror. now draw a self portrait using pencil and a value scale of 1-10, but this time you can look at the paper.

~~~~~~~~~~~~~~~~~~~~~~~~~~~~~~~~~~~~~~~~~~~~~~~~~~~~~~~~~~~~~~~~

design fundamentals

sketchbook #4

due: monday, december 13th

  1. set up a small still life. use a desk lamp or other light source to light it from behind. draw it, use values to accurately portray the direction of the light source.

  2. use the same set up as in #1, but this time move the light source to the side so that it is being lit dramatically from one side. draw it, use values to accurately portray the direction of the light source.

  3. set up another still life of 3 different objects with 3 very different textures. use value to imply the form of the objects, as well as the textures.

  4. collect a bunch of items with very different textures. scraps of fabric, lace, burlap, etc, different types of paper or cardboard, wood, sea shells, sand paper, sand, dried beans or grains, diferent kinds of plastic, packages, etc. dont bring in anything valuable! Most of the items you bring in should be scavenged from the trash or recycling. put it all in a bag or box with your name on it.

    (this part counts as 2 sketches, so 20 points)