Fri. Nov. 23rd: Architecture Final Print Due
Mon. Nov. 26th: Light Film Due
Fri. Dec 7th: Light Contact Sheet Due
Fri. Dec 21st: Light Final Print Due
Fri. Jan 4th: Ecology and Texture Film Due
Fri. Jan 18th: Ecology and Texture Contact Sheet Due
Fri. Jan 25th: Last day to turn in any missing or redone assignments!
*Midterms*
1st period – Jan. 28
5th period – Jan. 30
9th period - Feb. 1
2nd light Final Print Due
Texture Final Print Due
Midterm Print Due
1 mounted print Due
Midterm Exam
*notice: ecology isnt due yet!! it will be due sometime in the spring, to allow for outdoor shooting.*
Fri. Feb 23rd: Snow Final Print Due
Sunday, December 9, 2007

photo assignment - Snow
Shoot images of snow and ice. You have the majority of winter to complete this. You do not need a specific roll dedicated to just shots of “snow”, take the opportunities when they come! Be creative!
Due: Feb. 23
Due: Feb. 23
photo assignment - Midterm
Photography Mid Term Exam
1st Period: Jan. 28
5th Period: Jan. 30
9th Period: Feb. 1
1.Texture Final Print Due
2.One Mounted Print Due: Choose your best print for presentation.
3.Midterm Print: Body Language
We are all aware of the effect body language has on each other... through the way we stand, posture, hand gestures, facial expressions, etc...
Shoot a roll of film exploring the expression of various emotions through body language. You are illustrating the human body showing emotion, in any way you can. Every part of the body counts, hands, arms, legs, eyes, etc. It can be abstract, for instance just part of the body, it can also be a complete body. It can also be a person interacting with another... Be creative!!!
Make sure each and every shot is taken at the proper exposure, use lights and/or a tripod if need be. Pay attention to the background... is it relevant, necessary, distracting, etc?
Your print must be composed and printed well and express a strong sense of body language and emotion.
You will be turning in one print, a contact sheet, and an exposure log that also explains each emotion or what the body is saying in each pose.
4.Written Exam:
You will be responsible for all of the information in the notes and hand outs you have received since September 10th. It will be multiple choice and feature lots of vocabulary. Review your notes!
1st Period: Jan. 28
5th Period: Jan. 30
9th Period: Feb. 1
1.Texture Final Print Due
2.One Mounted Print Due: Choose your best print for presentation.
3.Midterm Print: Body Language
We are all aware of the effect body language has on each other... through the way we stand, posture, hand gestures, facial expressions, etc...
Shoot a roll of film exploring the expression of various emotions through body language. You are illustrating the human body showing emotion, in any way you can. Every part of the body counts, hands, arms, legs, eyes, etc. It can be abstract, for instance just part of the body, it can also be a complete body. It can also be a person interacting with another... Be creative!!!
Make sure each and every shot is taken at the proper exposure, use lights and/or a tripod if need be. Pay attention to the background... is it relevant, necessary, distracting, etc?
Your print must be composed and printed well and express a strong sense of body language and emotion.
You will be turning in one print, a contact sheet, and an exposure log that also explains each emotion or what the body is saying in each pose.
4.Written Exam:
You will be responsible for all of the information in the notes and hand outs you have received since September 10th. It will be multiple choice and feature lots of vocabulary. Review your notes!
photo assignment - Ecology and Texture
Ecology and Texture
film due Dec. 17
You have two assignments to complete with this roll of film. The first being “Ecology”, the second being “Texture”
1.Ecology
“ecology” can be defined as "the comprehensive science of the relationship of the organism to the environment."
Find a subject that tells a story about how we effect our environment in a positive or a negative way. You are documenting the impact of the organism (people) on its environment. The impact could be good or bad. Take your time to think about the subject matter and what exactly the story is that you want to tell.
Take your time to focus your camera, adjust the aperture and shutter speed depending on your needs. Take your time to frame the subject in a way that the viewer is not distracted by extraneous objects or too much negative space. Create a strong focal point, remember the rules of composition.
Shoot a couple different concepts.
2.Texture
“texture” refers to the properties of and the sensations caused by the external surface of objects received through the sense of touch. It can be rough, grainy, smooth, slimy, soft, scratchy, shiny, furry, etc. Think of the contrast between sandpaper or silk.
Texture tells us about the nature of a subject, whether it's the rough surface of a straw hat, or the silky smoothness of satin. The light that reveals an object's texture also gives us a sense of its dimensionality.
Strong, direct light that rakes across an object from the side (called side lighting) emphasizes its surface characteristics in sharp detail, and creates a pattern of highlight and shadow. When shooting outdoors, it's a good idea to shoot early in the morning or late in the afternoon, when sunlight skims across a subject at a low angle. If you're taking pictures indoors, you can position lights this way, at any time you wish. All you need to do is to place the main light so that it lights the subject from one side.
Find objects or subjects with interesting textures, a grouping of contrasting textures, a grouping of similar textures... something that you find interesting. Remember the rules of composition!
You will print two photographs from this roll, one “Ecology”, one “Texture”
film due Dec. 17
You have two assignments to complete with this roll of film. The first being “Ecology”, the second being “Texture”
1.Ecology
“ecology” can be defined as "the comprehensive science of the relationship of the organism to the environment."
Find a subject that tells a story about how we effect our environment in a positive or a negative way. You are documenting the impact of the organism (people) on its environment. The impact could be good or bad. Take your time to think about the subject matter and what exactly the story is that you want to tell.
Take your time to focus your camera, adjust the aperture and shutter speed depending on your needs. Take your time to frame the subject in a way that the viewer is not distracted by extraneous objects or too much negative space. Create a strong focal point, remember the rules of composition.
Shoot a couple different concepts.
2.Texture
“texture” refers to the properties of and the sensations caused by the external surface of objects received through the sense of touch. It can be rough, grainy, smooth, slimy, soft, scratchy, shiny, furry, etc. Think of the contrast between sandpaper or silk.
Texture tells us about the nature of a subject, whether it's the rough surface of a straw hat, or the silky smoothness of satin. The light that reveals an object's texture also gives us a sense of its dimensionality.
Strong, direct light that rakes across an object from the side (called side lighting) emphasizes its surface characteristics in sharp detail, and creates a pattern of highlight and shadow. When shooting outdoors, it's a good idea to shoot early in the morning or late in the afternoon, when sunlight skims across a subject at a low angle. If you're taking pictures indoors, you can position lights this way, at any time you wish. All you need to do is to place the main light so that it lights the subject from one side.
Find objects or subjects with interesting textures, a grouping of contrasting textures, a grouping of similar textures... something that you find interesting. Remember the rules of composition!
You will print two photographs from this roll, one “Ecology”, one “Texture”
photo assignment - Light
LIGHT
To do: Shoot interesting images in a variety of lighting situations. You must have at least three examples of each of the below themes on your contact sheet. Explore different places, subjects, light sources, etc. Try various camera angles. Don't just take landscape shots. Experiment and have fun!
Silhouette: A silhouette is a well defined black shape that stands out against a brightly lit background. A silhouette is produced when we take a photograph of a subject that has strong back lighting. The subject will be darker than the bright background. Of course, in a silhouette it is the shape of the subject that makes the photo interesting.
Shadow: Take a look around for shadows and record them on film. You could show the shadow as the total focus of the image. Find a scene where shadows make interesting patterns or shapes. Take time to explore the "dark side".
Reflection: Take photographs where reflection of light is the main composition or interest point. Look at how things reflect light and how a reflection point in a photo can add major interest. The idea is to look for reflections in any shiny item, liquids, highly polished surfaces, etc, not only on classical mirrors, try to get the reflection clearly.
Night: The only rule is, the photos must be taken at night. The main goal isn’t to take photos in your basement at night time, the purpose of this assignment is to go out and capture the life, movement, mystery and behaviors surfacing after the sun sets...
Go out and explore!
To do: Shoot interesting images in a variety of lighting situations. You must have at least three examples of each of the below themes on your contact sheet. Explore different places, subjects, light sources, etc. Try various camera angles. Don't just take landscape shots. Experiment and have fun!
Silhouette: A silhouette is a well defined black shape that stands out against a brightly lit background. A silhouette is produced when we take a photograph of a subject that has strong back lighting. The subject will be darker than the bright background. Of course, in a silhouette it is the shape of the subject that makes the photo interesting.
Shadow: Take a look around for shadows and record them on film. You could show the shadow as the total focus of the image. Find a scene where shadows make interesting patterns or shapes. Take time to explore the "dark side".
Reflection: Take photographs where reflection of light is the main composition or interest point. Look at how things reflect light and how a reflection point in a photo can add major interest. The idea is to look for reflections in any shiny item, liquids, highly polished surfaces, etc, not only on classical mirrors, try to get the reflection clearly.
Night: The only rule is, the photos must be taken at night. The main goal isn’t to take photos in your basement at night time, the purpose of this assignment is to go out and capture the life, movement, mystery and behaviors surfacing after the sun sets...
Go out and explore!
photo assignment - Architecture
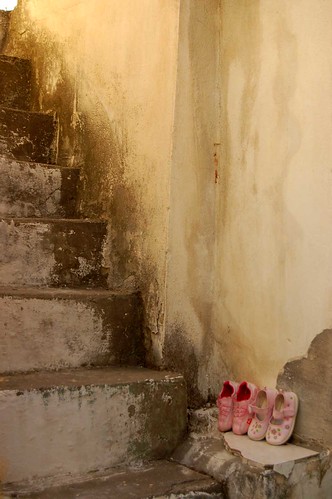
Every building has its own character or feeling that it gives you as you enter it or look at it. Like a real person, you need to look at it closely to capture the interesting details. Find a building and photograph it so that you can express that character. Concentrate on photographing sections of the structure that emphasize the character and distinctive design of the building.
You may choose to zoom in on certain elements; a door, stair, window, or crack in a wall. Try experimenting with unusual camera angles for this. Emphasize scale and perspective, try different lenses, shoot many different subjects...
Some suggestions:
bring your camera to as many places as possible, you never know what you may NEED to shoot!
go on adventures, plan trips to the city or historic towns in NJ...
pay attention to the time of day you shoot, different times mean different effects with light and shadows, watch the types of shadows that are cast by trees or other buildings...
think about good composition!
have fun!!
You may choose to zoom in on certain elements; a door, stair, window, or crack in a wall. Try experimenting with unusual camera angles for this. Emphasize scale and perspective, try different lenses, shoot many different subjects...
Some suggestions:
bring your camera to as many places as possible, you never know what you may NEED to shoot!
go on adventures, plan trips to the city or historic towns in NJ...
pay attention to the time of day you shoot, different times mean different effects with light and shadows, watch the types of shadows that are cast by trees or other buildings...
think about good composition!
have fun!!
Tuesday, September 25, 2007
Monday, September 24, 2007
camera manuals
if anyone cant find a manual for their camera, check this page out!
http://www.butkus.org/chinon/index.html
http://www.butkus.org/chinon/index.html
Thursday, August 23, 2007
Tuesday, June 26, 2007
one last post for the year...
just wanted to let you all know, if any of you actually check this anymore, that i put up a ton of work on our online gallery...
take a look!!
http://www.artsonia.com/schools/randolph4
thank you!
and have a wonderful summer!!
take a look!!
http://www.artsonia.com/schools/randolph4
thank you!
and have a wonderful summer!!
Sunday, June 3, 2007
final examsssss
Due Dates!
All current projects for all Painting and Design Fundamentals Classes are due at the beginning of class on Wednesday JUNE 13TH!! There are no exceptions.
Design Fundamentals - Still Life Paintings - Due June 13
Painting - Final Projects - Due June 13
Junior Portfolio - Sculptures - Due June 13, Final Projects & Written - Due June 20
Printmaking - Self Portraits - Due June 14
All current projects for all Painting and Design Fundamentals Classes are due at the beginning of class on Wednesday JUNE 13TH!! There are no exceptions.
Design Fundamentals - Still Life Paintings - Due June 13
Painting - Final Projects - Due June 13
Junior Portfolio - Sculptures - Due June 13, Final Projects & Written - Due June 20
Printmaking - Self Portraits - Due June 14
Wednesday, May 9, 2007
to my juniors...
it just might be getting close to that time when you are going to need to start thinking about portfolios and portfolio reviews. they always say even if you arent interested in the job, go on the interview anyway, it's good practice. so, go to open houses and portfolio reviews....
there is one in nyc...
most of them will be next year, check this website for national portfolio days, and you can talk to tons of people and it will really help you develop as an artist and college (art school) applicant!
Academy of Art University Open House- New York City
When: Sunday, May 13, 2007 10AM – 5PM (ongoing)
RSVP here
Where: THE ALTMAN BUILDING
135 WEST 18TH STREET
NEW YORK, NY 10011 (map)
What:
* Learn about our undergraduate & graduate programs
* Meet with academic staff, admissions and financial aid reps
* Have your portfolio reviewed (optional)
* Meet our alumni
* View our online class demonstrations
* Learn about our scholarships & payment plans
* We guarantee campus housing for all students!
This event is FREE. Easy access with NYC public transit systems.
800-544-2787 | www.academyart.edu
there is one in nyc...
most of them will be next year, check this website for national portfolio days, and you can talk to tons of people and it will really help you develop as an artist and college (art school) applicant!
Academy of Art University Open House- New York City
When: Sunday, May 13, 2007 10AM – 5PM (ongoing)
RSVP here
Where: THE ALTMAN BUILDING
135 WEST 18TH STREET
NEW YORK, NY 10011 (map)
What:
* Learn about our undergraduate & graduate programs
* Meet with academic staff, admissions and financial aid reps
* Have your portfolio reviewed (optional)
* Meet our alumni
* View our online class demonstrations
* Learn about our scholarships & payment plans
* We guarantee campus housing for all students!
This event is FREE. Easy access with NYC public transit systems.
800-544-2787 | www.academyart.edu
Wednesday, April 18, 2007
Thursday, April 12, 2007
jp - art history analysis paper
Works Cited
A Painting, Sculpture, or Photograph
Include the artist's name, the year the work was created, and the institution (e.g., a gallery or museum) that houses it, follwed by the city where it is located.
Goya, Francisco. The Family of Charles IV. 1800. Museo del Prado, Madrid.
Note that the title is in italics, as it should be in your paper.
you can go here for more help on works cited...
don't forget to proofread! read it out loud to make sure it makes sense.
2 ways to organize your paper...
* “Lumping” involves discussing all details of one work, and then all details of the second work. This method is preferred in lengthy or broad comparisons to avoid zipping back and forth between the works too quickly. Remember to compare the two works by referring back to the first work when discussing the second. This will ensure that you don’t simply write two descriptions.
* “Splitting” involves discussing a particular point in both works before moving on to another point. This method is preferred in comparisons dealing with fine details instead of a broader look at each work as a whole. Remember to discuss each point evenly to maintain a clear, parallel structure.
A Painting, Sculpture, or Photograph
Include the artist's name, the year the work was created, and the institution (e.g., a gallery or museum) that houses it, follwed by the city where it is located.
Goya, Francisco. The Family of Charles IV. 1800. Museo del Prado, Madrid.
Note that the title is in italics, as it should be in your paper.
you can go here for more help on works cited...
don't forget to proofread! read it out loud to make sure it makes sense.
2 ways to organize your paper...
* “Lumping” involves discussing all details of one work, and then all details of the second work. This method is preferred in lengthy or broad comparisons to avoid zipping back and forth between the works too quickly. Remember to compare the two works by referring back to the first work when discussing the second. This will ensure that you don’t simply write two descriptions.
* “Splitting” involves discussing a particular point in both works before moving on to another point. This method is preferred in comparisons dealing with fine details instead of a broader look at each work as a whole. Remember to discuss each point evenly to maintain a clear, parallel structure.
Sunday, April 8, 2007
Design Fundamentals
Sketchbook
Due: April 9th
1. Get a mirror and a candle. Draw a self portrait by candle light. Pay attention to how the light source is affecting the subject matter. Your drawing should touch at least 3 edges of the page, pay attention to detail and value.
2. Find a chair, stool, or step ladder. Draw the NEGATIVE space. Meaning, draw only the shapes of the space AROUND the chair. Fill in your negative space. Draw large and fill up the entire page.
3. Now, draw the same chair, stool or step ladder, but draw the actual object, and pay attention to the detail of the shapes, values, textures and details. Your drawing should touch at least 3 edges of the page.
Painting Sketchbook
Due: April 9th
1. Stand up next to a table. Put your sketchbook on the table, look down onto your foot/feet. Draw exactly what you see, draw exactly what you see. Pay close attention to detail and proportions.
2. Set up a still life of 3-5 objects you would find in your bathroom. Set up one source of light, draw exactly what you see, take your time, pay attention to detail, light source, and proportions.
3. A drawing of something from direct observation.
4. If you could paint anything you wanted, what would it be? Any subject matter or style... draw a well thought out and well developed composition. Add color.
Sketchbook
Due: April 9th
1. Get a mirror and a candle. Draw a self portrait by candle light. Pay attention to how the light source is affecting the subject matter. Your drawing should touch at least 3 edges of the page, pay attention to detail and value.
2. Find a chair, stool, or step ladder. Draw the NEGATIVE space. Meaning, draw only the shapes of the space AROUND the chair. Fill in your negative space. Draw large and fill up the entire page.
3. Now, draw the same chair, stool or step ladder, but draw the actual object, and pay attention to the detail of the shapes, values, textures and details. Your drawing should touch at least 3 edges of the page.
Painting Sketchbook
Due: April 9th
1. Stand up next to a table. Put your sketchbook on the table, look down onto your foot/feet. Draw exactly what you see, draw exactly what you see. Pay close attention to detail and proportions.
2. Set up a still life of 3-5 objects you would find in your bathroom. Set up one source of light, draw exactly what you see, take your time, pay attention to detail, light source, and proportions.
3. A drawing of something from direct observation.
4. If you could paint anything you wanted, what would it be? Any subject matter or style... draw a well thought out and well developed composition. Add color.
Subscribe to:
Posts (Atom)